
Why have subtitles in Instagram IGTV videos?
There are several reasons to have subtitles on your Instagram IGTV videos:
- Accessibility: You’re making your video accessible to the deaf and hard of hearing.
- Environment: The viewer may be watching in an environment where they can’t turn on their phone’s speaker and they don’t have headphones handy.
- Thumb-stopping: You want to grab the viewer even if they haven’t turned on audio yet. This is more true when you’re trying to stop thumbs from scrolling past, so we’ll see how effective it is for Instagram IGTV over time.
Where to put your Instagram IGTV video subtitles?
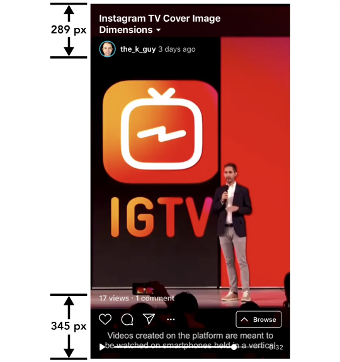
Let’s talk about where to place your subtitles. I would suggest placing them outside of where the Instagram IGTV overlay is shown. Why would you want to do this if these overlays are hidden most of the time? It isn’t that the overlay obscures your subtitles when someone wants to bring up an overlay. After all, they probably don’t need to read your subtitles at that moment. But your subtitles, if positioned under the overlay, can make the overlay harder to read, as shown below:
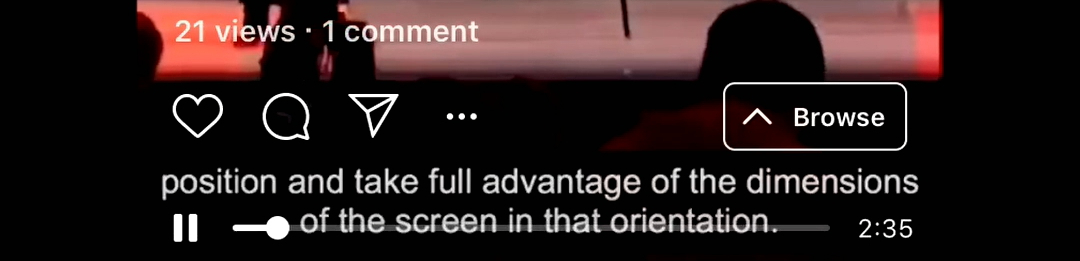
So where exactly does this overlay get placed? Based on my measurements, the top of the overlay text, including your comment count is 345 pixels from the bottom of the 1920 pixel height image.
How to add subtitles to your Instagram IGTV video?
My process for adding subtitles to Instagram IGTV consists of 5 major steps:
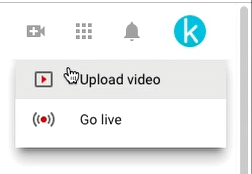
- Upload your video
Upload your video to a site like YouTube that will automatically generate closed captions.
- Download the SRT
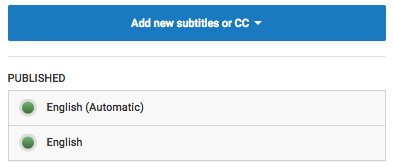
Download the SRT file that YouTube produced:
- Click the Subtitles/CC link.

- Choose from the list of subtitle options, if you’ve created more than one.
- Pop up the menu and pick the .srt option to download the SRT file.
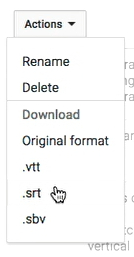
- Click the Subtitles/CC link.
- Convert SRT to FCPXML
Convert the SRT file to a FCPXML file. This can be done with tools like SubSimple to create the FCPXML file from your SRT file.
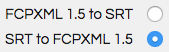
- From the SubSimple website, click the “SRT to FCPXML 1.5” button
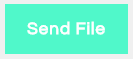
- Choose the SRT file you previously downloaded.

- Click the “Send File” button to download the FCPXML.
- From the SubSimple website, click the “SRT to FCPXML 1.5” button
- Copy FCPXML Contents to Clipboard
Import the FCPXML file into your non-linear editor of choice. For the free editor DaVinci Resolve there are three sub-steps.
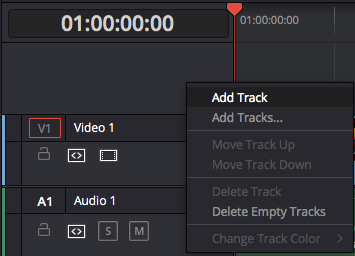
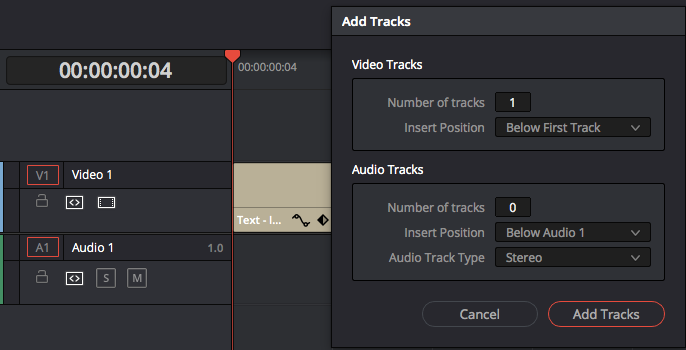
- Open your video project, go to the Edit workspace (Shift + 4) and add a track on top of everything else for your subtitles to go. Note what track number it was.
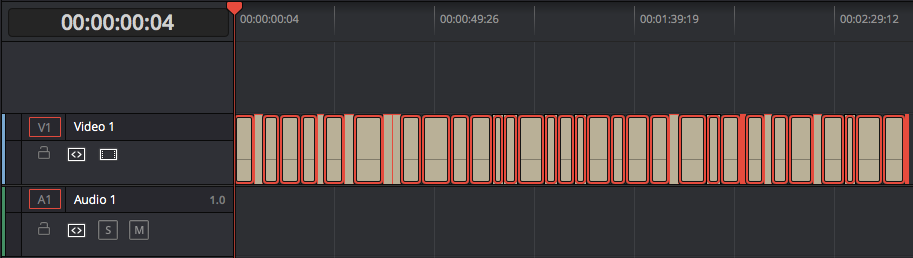
- Create a new, empty project. Import the fcpxml file and move the video track up to match where it would go in the other file.
- Select all the subtitles (Command + A on Mac, Ctrl + A on Windows). Copy to clipboard (Command + C on Mac, Ctrl + C on Windows).
- Reopen your original video, go to the Edit workspace (Shift + 4), move the red timeline position indicator to the start of the timeline, and paste (Command + V on Mac, Ctrl + V on Windows) from the clipboard.
- Open your video project, go to the Edit workspace (Shift + 4) and add a track on top of everything else for your subtitles to go. Note what track number it was.
- Resize and Reposition Your Subtitles
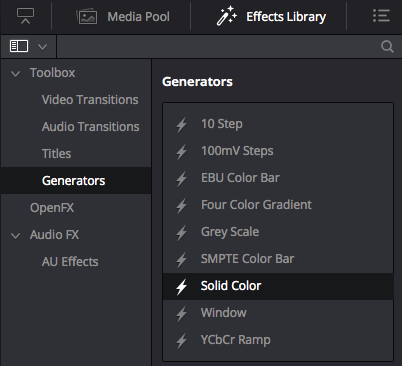
No matter what non-linear editor you use, the last step is to adjust the size and position of your text and republish your video with burned-in captions. With Resolve, you position your text by selecting it and bringing up the inspector. I like to use white text against a dark background, so I create a track underneath the subtitles for the background and place a solid color generator from the Toolbox in the Effects library.
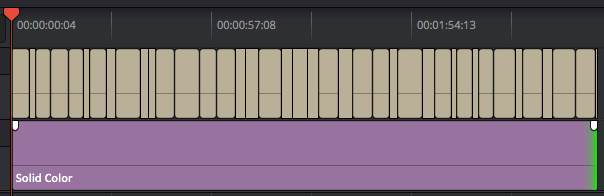
Then I stretch the solid background to fill the timeline.
Next, I select the solid color background and bring up the Inspector.
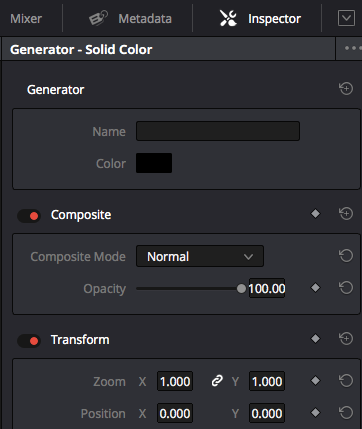
I want to make the background 134 pixels high, which is 7% of 1920, so I set the Zoom Y to 0.07.

Next, I position the 134 px height background so that it is just above the 345 px of overlay text. This puts the middle (67 px) of the background 412 px from the bottom. DaVinci Resolve measures this from the middle (960 px) of the 1920 px screen by default, so the background’s own middle should be 548 px down from the middle of the screen.

For the subtitle text itself, I select all the subtitle text blocks in the timeline and use the Inspector to set the font size to 26.

The position is measured from the bottom of the screen, so I set the Y position to 412 px.

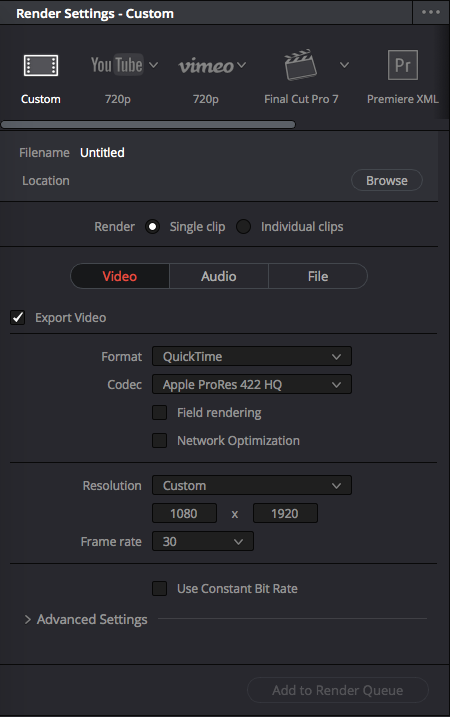
Publish the final video in Resolve by going to the Deliver workspace (Shift + 8). Choose your render settings to be a Custom resolution of 1080 x 1920 px. Click the “Add to Render Queue” button and click the “Start Render” button.
Please let me know in the comments below whether or not this is useful for you and if there are any details I should be adding to make this article more helpful.
Pingback: 10 social media trends for 2021 – Princheryl()